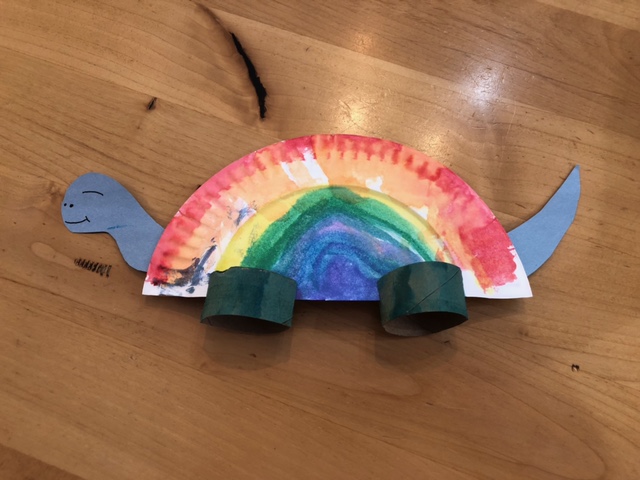
Does your toddler love dinosaurs? My son recently went to a dinosaur museum for the first time, and it is all he talks about now. He loved seeing the ginormous dinosaurs and can’t wait to go back. He keeps asking for new dinosaur toys and shows. I thought doing some dinosaur art together would be perfect to entertain him and get his creative juices flowing.
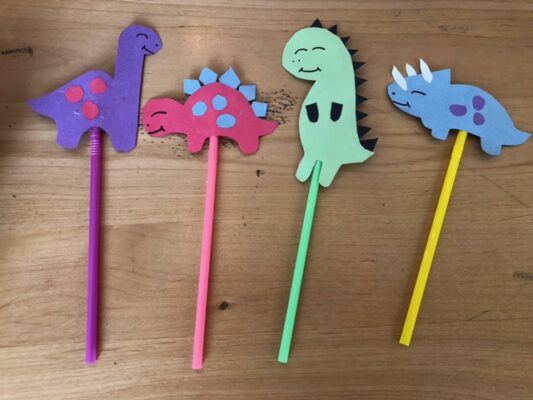
I will be sharing 3 easy dinosaur crafts that you can do with your toddlers anytime. These dinosaur crafts will give your children four dinosaur puppets to use for puppet shows, a fun triceratops mask to wear, and a sturdy dinosaur toy that can be a figurine to display in their room or a toy to play with.
During the winter, it’s hard to find activities to keep your children occupied and having fun all the time. Crafts are a great way to help children develop fine motor skills, use their creativity, and create bonding time for the parent and child.
The dinosaur crafts chosen can be used in different ways for play, but they are all crafts that can be interactive which is my favorite way to do crafts. As pretty as a picture is to hang on the fridge, making crafts that can be played and interacted with is more worth my and my child’s time because they can keep using the craft after we make it.
Easy Dinosaur Projects for Kids
Here are three of our favorite dino-themed art projects kids can make.
Dinosaur Puppets on Straws
With this fun craft idea, you get multiple dinosaur toys to play with. You can put on a puppet show, use the dinosaurs in imaginative play, or have them chase your siblings around. This dinosaur art is easy to make and a lot of fun for kids to do.
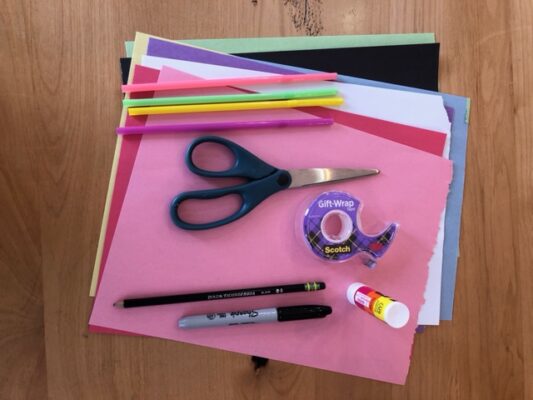
Supplies:
Straws (4 per child)
Construction Paper (different colors)
Glue (glue stick)
Scotch Tape
Scissors
Sharpie
Pencil
Step 1: Draw the dinosaur shapes
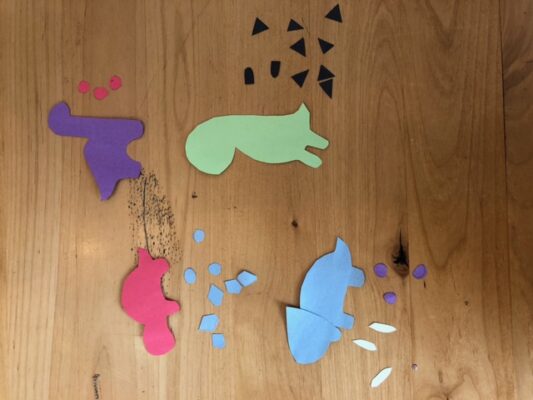
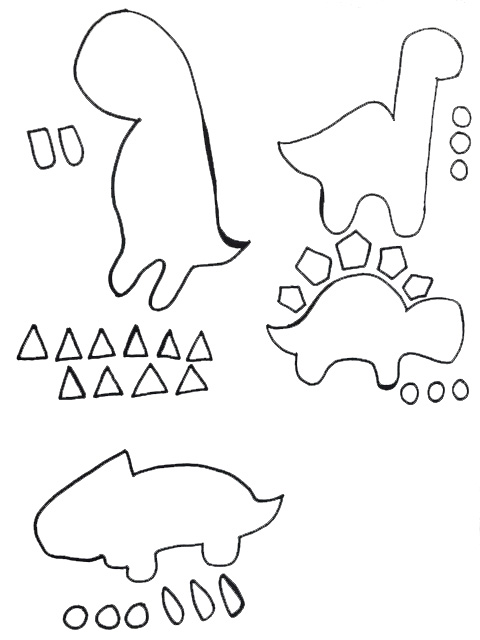
You will need to draw the different shapes of the dinosaurs on construction paper. You need to also draw the spots, scales, arms, and horns of each dinosaur. Draw each of the dinosaurs on different colors of paper. Draw the spots, scales, horns, and arms on different colors of paper as well.
Your toddler can help decide which colors they want to use for the different dinosaurs. It makes the most sense for the horns on the triceratops to be white, but feel free to choose a different color if you so desire.
Step 2: Cut out the pieces
The dinosaur shapes, spots, scales, horns, and arms need to be cut out with scissors. If your toddler can use scissors then they can try and help with this part, but if it’s too difficult for them then just cut out the patterns yourself. Make sure to put the cut out dinosaur patterns, spots, scales, horns, and arms in the correct piles, so they don’t get lost or mixed up.
The piles will be triceratops, stegosaurus, T-rex, and brontosaurus. You can always refer to the template up above, so you know what dinosaur parts go together. Drawing and cutting out the dinosaurs and dinosaur parts was the most boring part for my child, so maybe have them color a picture of a dinosaur while you get the dinosaurs ready.
Step 3: Use glue to attach the dinosaurs together
This is the part where you child can do a lot of the dinosaur paper craft by themselves because they can use the glue stick to help stick pieces of the dinosaur together. They will still need guidance, but hopefully they can glue a lot of the pieces together by themselves. My 3-year-old couldn’t do the glue by himself, so I told him where to put the glue and then I put the piece of paper on the glue. He used his finger to help push the piece of paper onto the other.
First, attach the three sets of spots to the backs of the triceratops, stegosaurus, and brontosaurus.
Second, attach the scales and arms to the T-rex. We put glue on the back side of the T-rex and put a long line of glue from the tail up to the top of the head. We then attached the scale triangles on the back side of the T-rex.
Third, attach the scales to the stegosaurus back. We put glue on the back side of the stegosaurus and put a long line of glue from the beginning of the tail up to the beginning of the neck. We then attached the scale triangles on the back side of the stegosaurus.
Fourth, attach the horns to the triceratops head. Two of the horns go on the front side of the triceratops face, while the other one should be glued to the back side of the head.
Fifth, attach the triceratops head to the front side of its body.
Step 7: Use a sharpie to draw faces on the dinosaurs (eyes, nose, and mouth).
Step 8: Attach the dinosaurs to straws using scotch tape.
Enjoy your craft dinosaur puppets! You can spend hours acting out dinosaur plays, doing make believe, and incorporating the dinosaur toy puppets into play with other toys. You can keep this craft for a long time and pull it out anytime your toddler gets an itch to play with dinosaurs!
Triceratops Mask
Supplies:
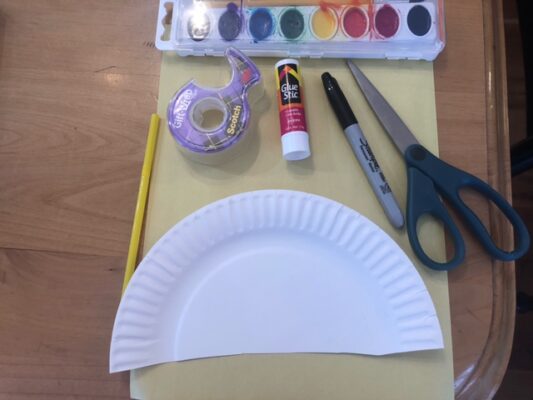
Paper plates
Construction paper
Straw
Acrylic or watercolor Paint, crayons, colored pencils, or markers
Scissors
Glue stick
Scotch Tape
Pencil
Sharpie
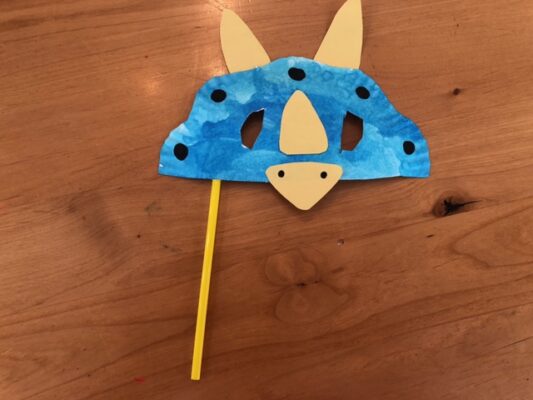
This is a fun craft because your child can use the mask as part of a costume during imaginative play. This mask will help children feel like they are really dinosaurs which always make believe play feel more real. To make the mask colorful, you can paint or color it. My son wanted to paint the triceratops mask, so we used watercolor paints to paint his mask. Crayons, colored pencils, or markers would work just as well to color the mask.
Step 1: Trace a triceratops head on the paper plate
You will only use half of the paper plate to make this triceratops mask, so draw a line across the middle of the paper plate. Around the edge of the paper plate, draw a curvy line as demonstrated in the picture below.
Step 2: Trace the horns, nose, and mouth of the triceratops onto construction paper
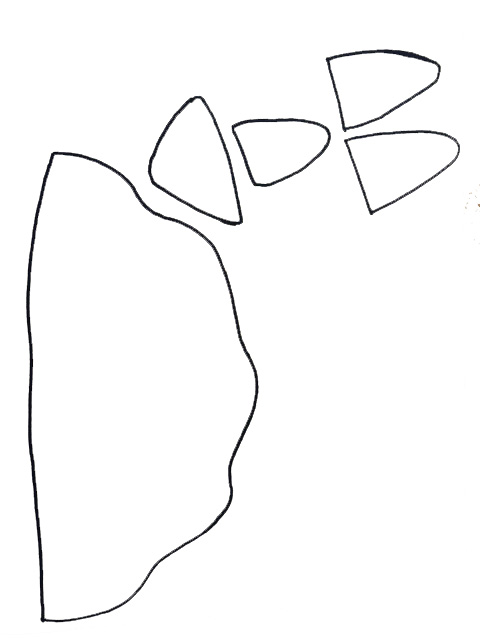
Your toddler can choose whatever color they want for the horns, nose, and mouth.
Step 3: Use scissors to cut out the triceratops mask, horns, nose, and mouth
You will cut out the triceratops mask from the paper plate. You will cut out the horns, nose, and mouth from the construction paper.
Step 4: Draw and cut out eye circles on the mask
Hold the mask up to the top half of your child’s face and pin point where your child’s eyes are, so that you can draw circles for where your child’s eyes are. The circles should be an inch in diameter. Draw the circles. Poke a hole in the middle of each circle using a pencil. Then use scissors to cut out the eye circles. You may have to bend the paper plate to cut out the circles.
Step 5: Paint or color the mask
Use acrylic or watercolor paint and have your child paint the mask whatever color they want. They can do a solid color or many different colors if they want. If you want, you can paint or draw five spots on the outside of the triceratops head. Use a different color for the spots than the mask color. Let the mask sit until it’s completely dry. Or you can use markers, crayons, or colored pencils to color the triceratops mask instead.
Step 6: Attach the horns, nose, and mouth to the triceratops mask
If you painted the mask, make sure it is completely dry before glue on the horns, nose and mouth. Otherwise, they won’t be able to stick to the plate.
Step 7: Draw or paint two dots on the mouth of the triceratops
Step 8: Attach a straw to the side of the mask
Use tape to attach the straw to the side of the mask, so that your child can hold the mask up to their face while they are playing.
This craft is especially fun if all your kids or parents also make the triceratops mask, that way everyone can pretend together! Your child will be excited for the make believe possibilities and will enjoy pretending to be dinosaurs with you. It can be used repeatedly which is another win.
My son liked this craft a lot because he got to paint which is one of his favorite activities. This craft doesn’t make a big mess, is inexpensive, and I had all of the supplies already which was a win. My son has been using his triceratops mask for days and keeps asking if we can make other dinosaur masks!
Dinosaur figures craft
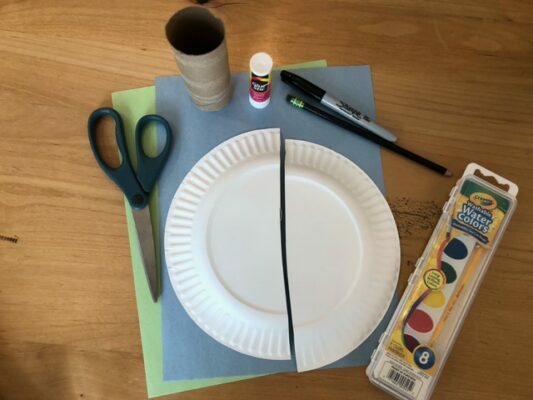
Supplies:
Paper plate (1)
Toilet paper roll (1)
Acrylic or watercolor paint
Construction paper
Glue
Scissors
Sharpie
Pencil
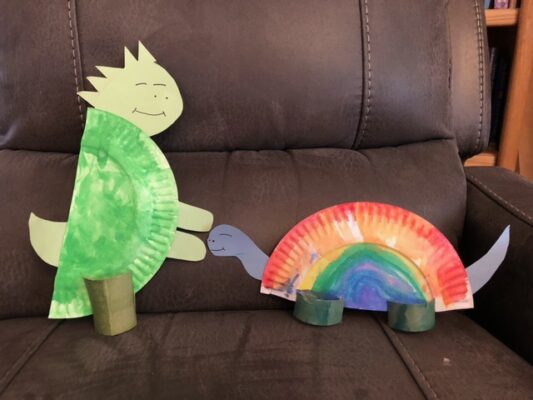
These dinosaur figure crafts makes a great toys to play around with or they can also be displayed in a child’s bedroom. You can make multiple dinosaur toys if you want, the heads and tails will just look different depending on which dinosaurs you decide to make. The instructions below will be for a T-rex and a brontosaurus.
Step 1: Cut the paper plate in half
Step 2: Paint the two halves of the paper plate
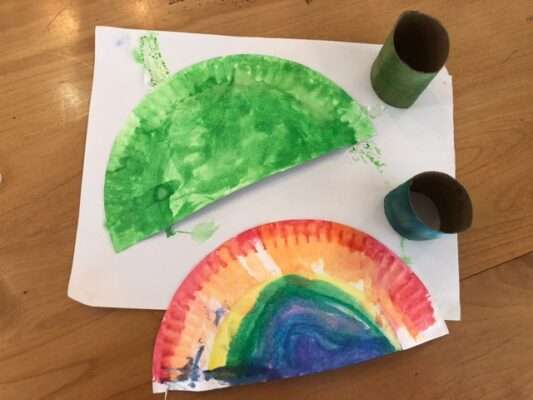
My son wanted two different dinosaurs, so he painted both halves of the paper plate different colors. Make sure to put the paper plates on a piece of paper, so your child doesn’t get paint everywhere. Also, tape down the mask to the paper on the corners, so it doesn’t move around while your child tries to paint. One side of the paper plate was green for a T-rex. The other side of the paper plate was a rainbow because my son wanted to do a rainbow brontosaurus.
Step 3: Cut the toilet paper roll in half
Stand the toilet paper roll up and cut it right through the middle of the toilet paper roll. You may need to bend the toilet paper roll in half to cut it more easily.
Step 4: Paint the two halves of the toilet paper roll
Paint one half of the toilet paper roll the same color as one of the halves of the paper plates. Paint the other half of the toilet paper roll the same color as the other half of the paper plate. One half of the toilet paper roll was green (T-rex). The other half was blue to match the rainbow paper plate half (brontosaurus). Set them aside to dry.
Step 5: Cut the brontosaurus (blue) toilet paper roll half in half again
Then cut slits about half an inch deep in the sides of the two smaller toilet paper rolls (blue).
Step 6: Cut two slits about an inch deep into the T-rex (green) toilet paper roll on each side
This is a great opportunity for your child to practice using scissors and cutting a small, straight line.
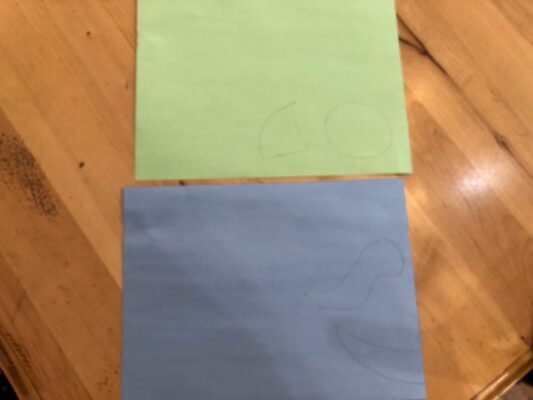
Step 7: Trace the dinosaur head and tail on the construction paper
You can draw this by hand or use this template.
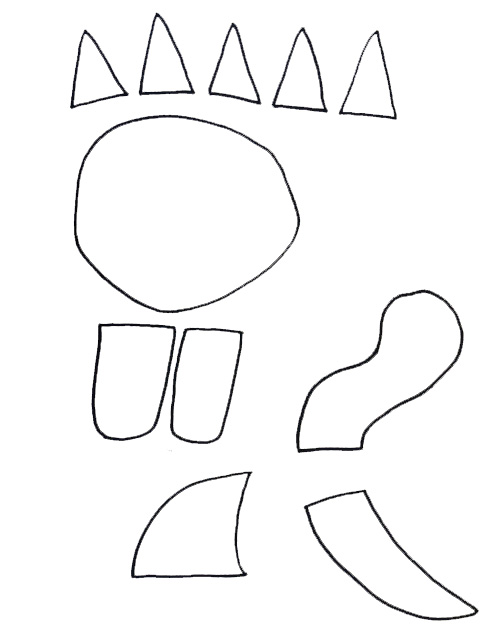
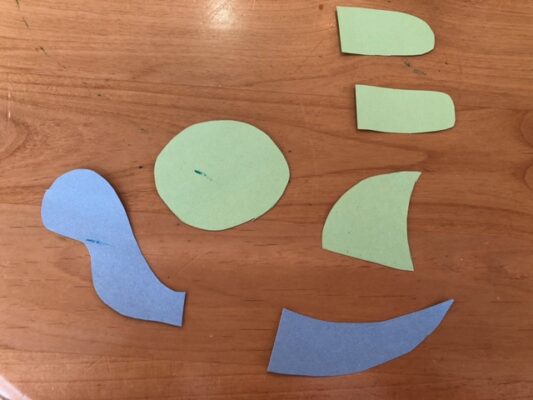
You will draw a head and tail for the brontosaurus. I used blue construction paper for the brontosaurus head and tail. You will also draw a head, tail, arms, and spikes for the T-Rex. I used green construction paper for the T-Rex body parts.
Step 8: Cut out the dinosaur body parts
Step 9: Glue or tape the brontosaurs head and tail onto the brontosaurus paper plate (rainbow)
Step 10: Draw an eye and nose on the brontosaurus head
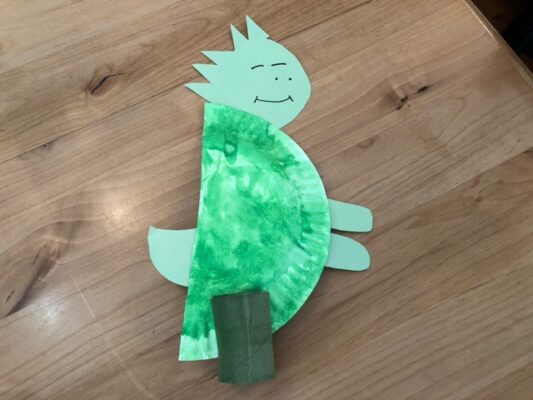
Step 11: Glue or tape the T-Rex head, tail, spikes, and arms onto the T-Rex paper plate (green)
Step 12: Put the brontosaurus paper plate body into the slits in the two smaller toilet paper rolls
Then put the dinosaur body into the slits in the taller toilet paper roll (green)
This craft is so much fun for kids because it gives them sturdy toys they can actually play with. My son started playing with his dinosaurs immediately after we finished the craft. He was so excited about the little dinosaur friends he now had to do make believe.
We also got some rocks and branches from outside and made a little dinosaur playground for the dinosaurs to play in which my son loved doing. It made the dinosaurs come alive even more for him. Not only can these dinosaurs be toys, but they can be figurines on the shelf that your child looks at everyday when they aren’t being played with.
This craft is so easy to do because I already had the supplies at home, it is extremely inexpensive, not very messy, and doesn’t take a super long time. My toddler was also able to practice his fine motor skills and use his creativity. This is the perfect type of craft to do on a rainy day or anytime your toddler needs a little pick me up.
Conclusion
Every dino fan loves making a dinosaur craft. I hope you enjoy making some of these fun dinosaur art projects with your child. Your child will love the finished project, and you will love that they are inexpensive and easy to make! The best part about these DIY dino crafts is they can be played with after they are made–a project and a toy!
