The festive colors of Christmas combined with the renewed focus on family makes Christmas a perfect time for a family Christmas craft! Doing something fun and creative together is the perfect recipe for quality bonding time. Now you just need the perfect craft–something creative and cute, but also kid and budget-friendly. We’ve got you covered there. These crafts are just right to do alongside your kids. Start a new Christmas tradition of making crafts together.
Cupcake Liner Christmas Tree
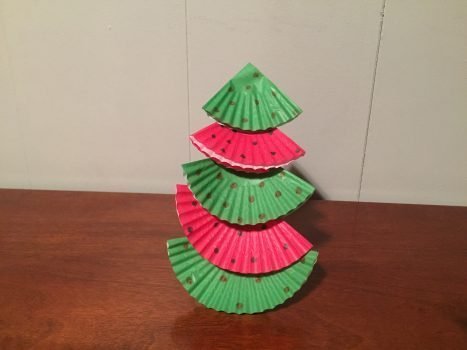
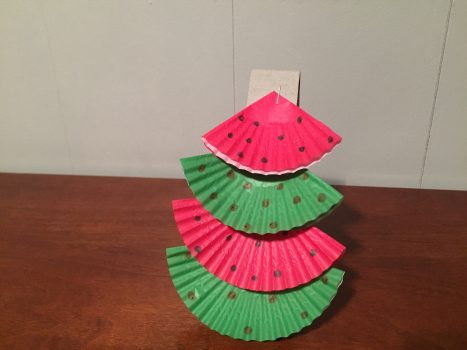
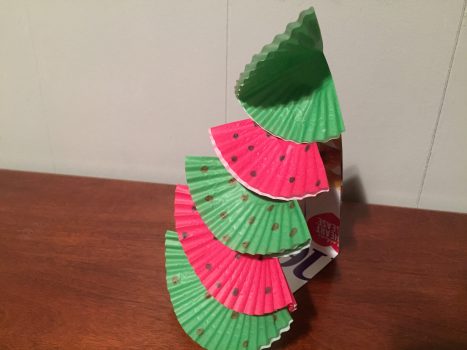
This craft one turned out so cute! The folds in the cupcake liners add a little dimension to the tree and its layers are cute but simple too.
I specifically made this one with display in mind. I wanted it to be able to stand up on its own so it can be set out the coffee table or somewhere that it can be displayed and enjoyed without needing to be propped or pinned up. Start thinking of where you’d like to display it while you gather your supplies.
Supplies:
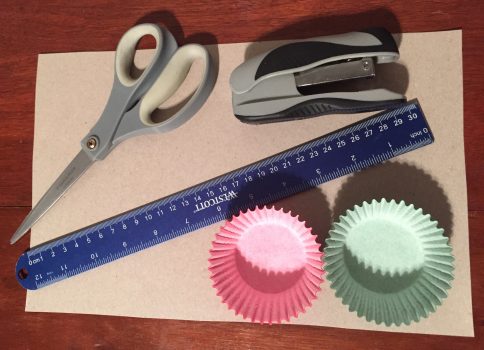
- A piece of thin cardboard (a cereal box is perfect for this. That’s what I used)
- A ruler
- A pair of scissors
- A stapler and staples (mini-size, if possible)
- Standard-size cupcake liners (You choose the colors and patterns.)
- Optional decoration items: markers, crayons, stickers, glitter glue, confetti, what you have lying around or want to buy and that your kids enjoy using.
Of course, the advantage of plain ones is that it’s a blank slate for decorating. If you are doing this with more than one child and have patterned liners, the trees might all look pretty similar instead of being customized by each child. I chose to stick with solid colors, green and red.
Step 1: Make the cardboard stand.
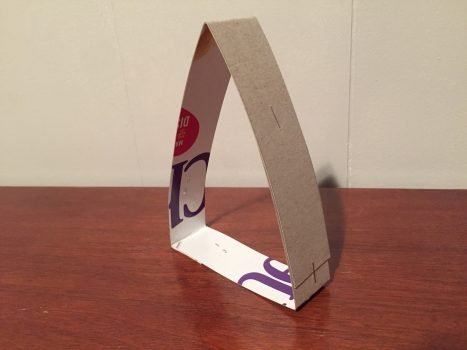
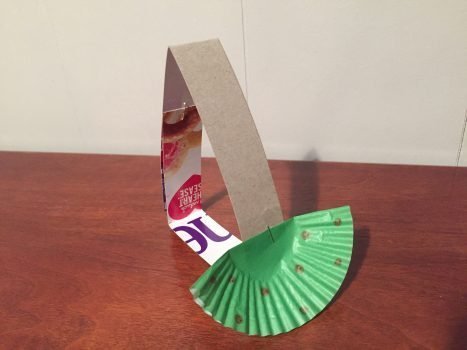
Cut the cardboard into strips about 1.5″ wide. You’ll need about 18 inches total but it’s ok if they are in two or three different pieces because it’s easy to staple them together. Fold the strips and staple them together how you need to in order to make a triangle that has two six-inch sides and one four-inch side, like this.
Step 2: Fold the cupcake liners into “tree branches.”
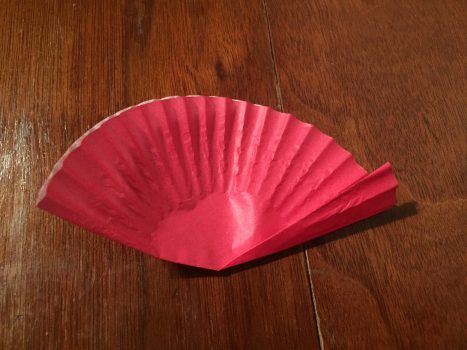
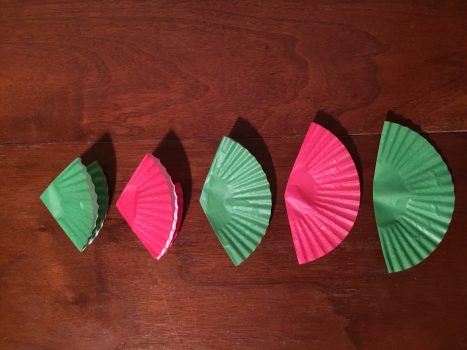
Figure out which liners you will be using for each layer on the tree. You can alternate colors, use all the same colors, or use a different color or pattern for each one. Flatten the cupcake liners so they are circles and then fold them in half. The bottom tree layer doesn’t need to be folded any more than this.
The other branches in the tree will need to be progressively folded at smaller and smaller angles the higher it is up the tree. Just take a section and fold it back so the part showing on the front is a narrower angle than the previous one. Here are my pictures so you can see approximate amounts to fold them back but you can be creative about how much you do it exactly. My top piece is just folded in half a second time so it’s at a 90-degree angle.
Step 3: Decorate the tree branches.
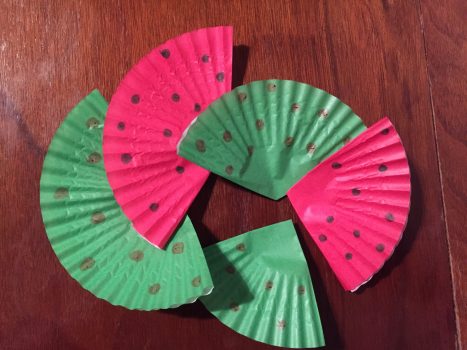
This is when your kids get to use whatever supplies you have available and go to town making their tree festive and fun. Help them remember to decorate the correct side of the cupcake liner. Make sure to leave enough time for the layers to dry completely before the next step if they have used any kind of glue. Mine are colored in polka dots with markers.
Step 4: Assemble the tree.
Put the largest piece on the bottom of one of the six-inch pieces of cardboard (the four-inch side should be the bottom of the triangle) with about 1/2″ hanging off the bottom and curling slightly out in front. Staple it into place, with the staple toward the top of the tree. Don’t worry about the staple showing; it will be covered by the next branch.
Staple the next higher piece in place, ensuring the previous staple is covered and it is centered. Continue up the tree doing the same thing, but don’t do the very top piece quite yet because it has to be done a little differently.
For the top piece, there should be a full four layers of paper. If you pull the top two up a little bit, you can staple the bottom two down so it is held in place, but the staple will be hidden once you fold the other side down again.
If it doesn’t stay down quite as well as you would like, carefully staple the next layer down too so that only the very top layer isn’t stapled down.
That’s it! It’s a cute little tree, not quite 3D but still with its own stand so it’s easy to display without extra support. You can add a star if you want (a sticker or cut one out of paper and glue it on), but I think it looks cute without a star.
Christmas Tree on a Stick
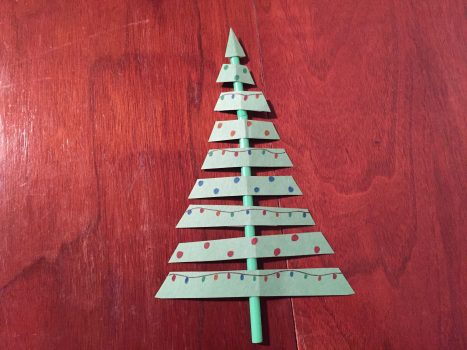
Just like any food on a stick is a hit, crafts on a stick are the same way! And when the stick is just a straw (or two), it’s pretty easy to put crafts on a stick! This Christmas Tree on a Stick is easy and fun and still leaves room for creativity. It’s also easy on your Christmas budget!
Supplies:
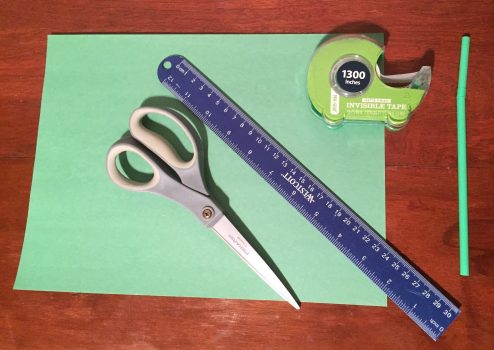
- Green construction paper
- A ruler
- A pair of scissors
- Transparent tape
- A straw (or two, if you want a longer stick)
- Lightweight tree decoration items: markers, crayons, thin stickers (heavier ones might make it too heavy)
I chose a green straw but it might be fun to use a brighter color or pattern! It’s up to you!
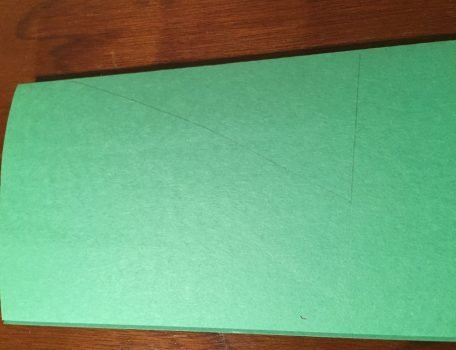
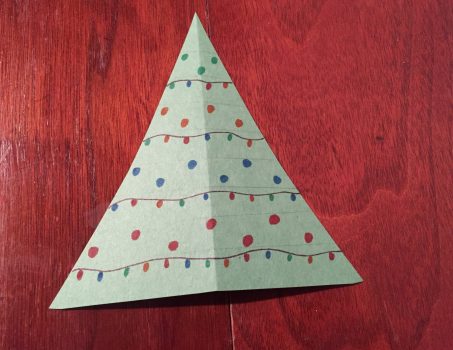
Step 1: Fold the construction paper in half and draw half of a simple tree on one side so that when you cut it out and unfold it, your two sides will be symmetrical. The tree needs to shorter than the straw height by at least a 3 inches so you can spread out the strips and still have everything fit. My straw was 8″ so I made my tree 4.75″ tall.
Step 2: Use the ruler to draw straight lines evenly spaced about 1/2″ apart. This is where you will cut later, but you want the lines there now so that decorations don’t overlap two sections, unless that’s what you’re going for.
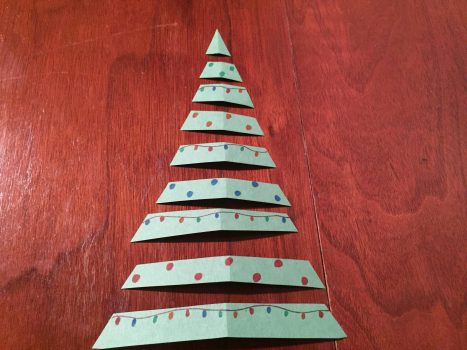
Step 3: Decorate your tree! I did multi-colored bulbs and strands of lights, but there are so many options for making your tree festive and cute. Just keep in mind that the sections will get separated.
Step 4: Cut along the lines so you have the sections all separated.
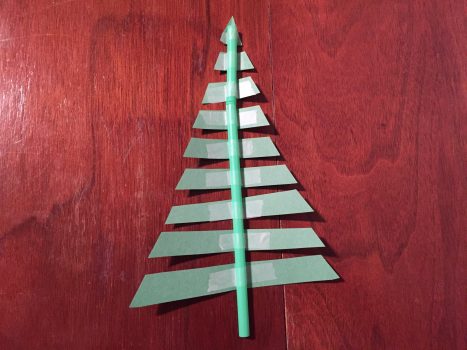
Step 5: Tape the pieces onto the straw. Start at the top (so you don’t run out of space) and don’t get discouraged with that top section. It’s the hardest one because it’s the smallest but they get easier. You may need to cut your tape thinner so it won’t show on the other side.
(Optional) Step 6: If you would like a longer handle on the bottom, you can put another straw inside the first one by cutting a tiny slit in the end of one and squeezing the end of the other straw smaller so it can be pushed inside. You can tape it to make it extra secure but it wasn’t necessary for mine.
You’re done! I’m sure they’ll turn out adorable. I keep thinking this would be a cute little prop for a Christmas parade or concert or something where kids need something to do with their hands that adds a visual element to a performance. They would have a ball waving it around!
Potato Stamp Wrapping Paper
This is a fun one because it uses a potato! Plus, making your own wrapping paper is such a memorable way to give a gift! I think grandparents will especially love it. And it’s a craft kids love.
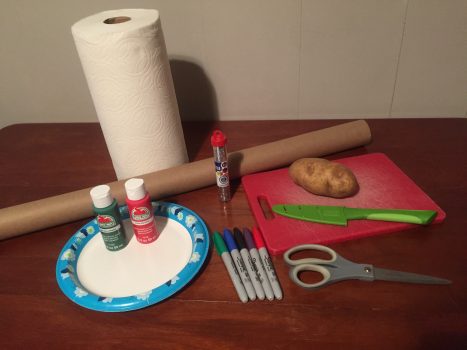
Supplies:
-
- A roll of craft paper
- A pair of scissors
- Paper towels
- Paper plates
- Paint (acrylic or poster paint)
- Potato
- Cutting board
- Knife
- Writing utensils (I used Sharpies because I thought they would stand out best, but you could use regular markers or even a pen or crayons)
- Optional: Glitter, stickers
Step 1: Make your potato stamp.
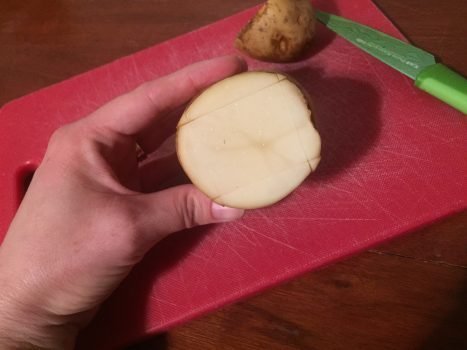
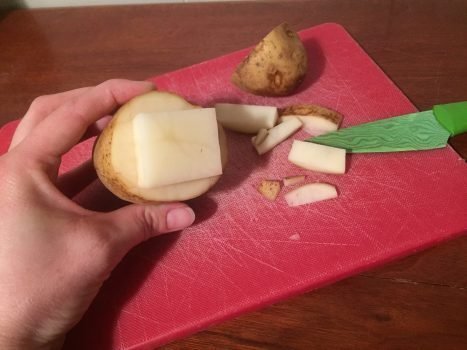
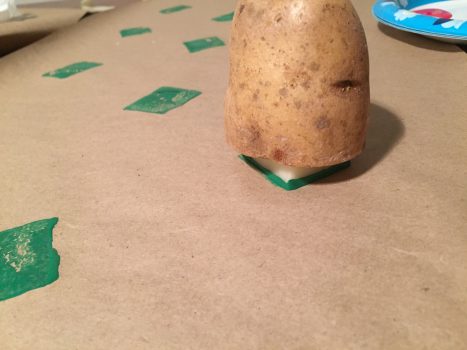
Cut the end of the potato off. You want to cut it off far enough that the cross-section of the potato will fit the shape you want to stamp. Then cut the shape you want with 1/2″ cuts.
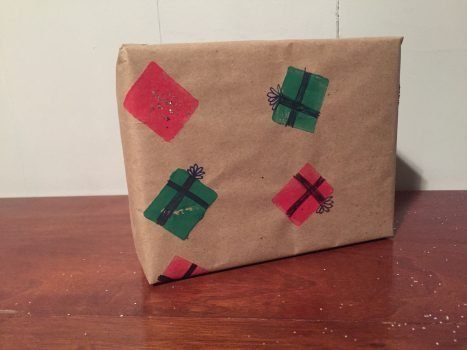
I did a simple rectangle because I wanted to make presents on my wrapping paper. You could cut a circle and make snowmen, a tree shape for a Christmas tree, a star, a stocking, whatever you want. Just keep the shape pretty simple so you can cut it easily. Then carefully cut around the side of the potato 1/2″ back from the cut end so that the outside pieces fall off and just your desired shape remains.
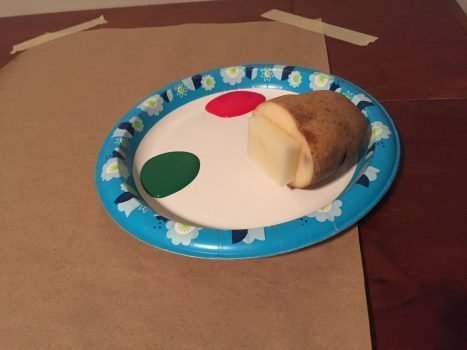
Step 2: Prepare your wrapping paper and paint plate. Cut off the amount of paper you need. I knew ahead of time what size the gift was so I could cut off just the amount of wrapping paper I needed. It’s also a good idea to tape your paper down to your workspace so it doesn’t roll up and get paint where it’s not supposed to be. Squeeze your paint onto a paper plate so you can dip the potato stamp into it there.
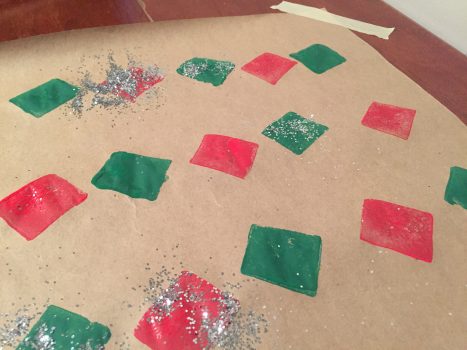
Step 3: Stamp your shapes. It’s easy to get too much paint so rub the potato on the plate a bit so that not quite so much paint sticks to the potato. You can also lightly dab it with a paper towel. If you’d like to, you can practice a few times on a scrap piece of paper so you can get used to how the stamp transfers the paint. A few times my stamp left some blank spaces so I dipped my finger in the paint and filled in the holes a bit. Some of the smaller holes showed a little bit of the potato texture and I liked that look so I left them that way.
Make sure you rinse your potato off and dry it if you want to switch to another color. If you want to add glitter, add it while the paint is wet. I thought glitter on every present might be overkill so it’s only on some of the gifts. (Stickers should wait until it is dry though.) Let it dry completely.
Tip: Keep in mind how big the present is and how much of the pattern/design you create will show once it is wrapped. For example, if you are making snowmen that are 6 inches tall, then you probably don’t want to wrap a tiny box with that paper. If you don’t know what you will be wrapping yet, go with a smaller pattern so that it can be used for any size of gift.
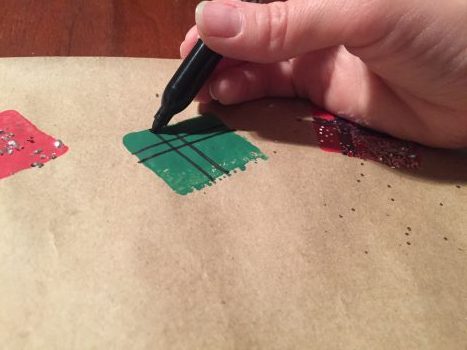
Step 4: Add the finishing touches. Add stickers if you choose to. Draw in any details you would like. I drew ribbon and bows on my presents. Maybe you will be drawing snowman accessories, Christmas tree decorations, stocking embellishments, whatever you want!
Step 5: Wrap your present! And then enjoy the look on the receiver’s face when they say, “Did you make your own wrapping paper?!”
